Detailed Guide for Deploying Passbolt Community Edition through the Linode Marketplace

Passbolt Community Edition is a powerful open-source password manager designed for teams and businesses, enabling secure storage, sharing, and management of passwords. Deploying it through the Linode Marketplace simplifies the process by offering a one-click setup on Akamai’s reliable cloud infrastructure. This guide provides step-by-step instructions to deploy, verify, and configure Passbolt Community Edition via the Linode Marketplace.
Introduction
Passbolt Community Edition is tailored for collaborative environments, ensuring sensitive information remains protected while accessible to authorized users. By leveraging the Linode Marketplace, you can quickly deploy a self-hosted Passbolt instance without complex manual configurations, making it an ideal solution for IT professionals, system administrators, or tech-savvy business owners seeking a secure password management system.
Prerequisites
Before starting, ensure you have the following:
- A Linode Account: Sign up at Linode’s website if you don’t have an account. New users receive a credit that can cover services for the first few days.
- Basic Knowledge: Familiarity with cloud computing concepts and web applications is helpful.
- Domain Name (Optional): While not required, a domain name is recommended for production use to enable secure HTTPS access.
Accessing the Linode Marketplace
To begin deploying Passbolt:
- Navigate to Marketplace: From the dashboard, click the “Marketplace” link in the left navigation menu.
- View Options: You’ll be directed to the Linode Create page with the Marketplace tab selected, displaying available applications.
Selecting and Configuring Passbolt Community Edition
Follow these steps to select and configure Passbolt:
- Choose the App:
- In the “Select App” section, find and select “Passbolt Community Edition”.
- Select a Distribution:
- Choose a compatible Linux distribution, such as Ubuntu 22.04 LTS or Debian 11, which Passbolt supports.
- Pick a Region:
- Select a region for your Compute Instance closest to your users for optimal performance.
- Choose a Plan:
- Opt for a 4GB Dedicated CPU or Shared Compute instance, as recommended for Passbolt’s requirements.
- Set Up a Limited Sudo User:
- Username: Enter a username (e.g., passboltuser). Avoid capital letters, spaces, or special characters.
- Password: The system will generate a strong password automatically.
- Purpose: This user is assigned to the sudo group, allowing elevated permissions with the sudo command for enhanced security.
- Add SSH Key (Optional):
- For secure access, upload an SSH public key. This is a best practice to avoid password-based logins.
Deployment Process
Once configured:
- Initiate Deployment:
- Click the “Create Linode” button to start the process.
- Provisioning and Installation:
- The system provisions your Compute Instance and installs Passbolt Community Edition automatically.
- Wait Time:
- Allow 5-10 minutes for the installation to complete. Avoid interrupting the instance during this period.
Verifying Installation
After deployment:
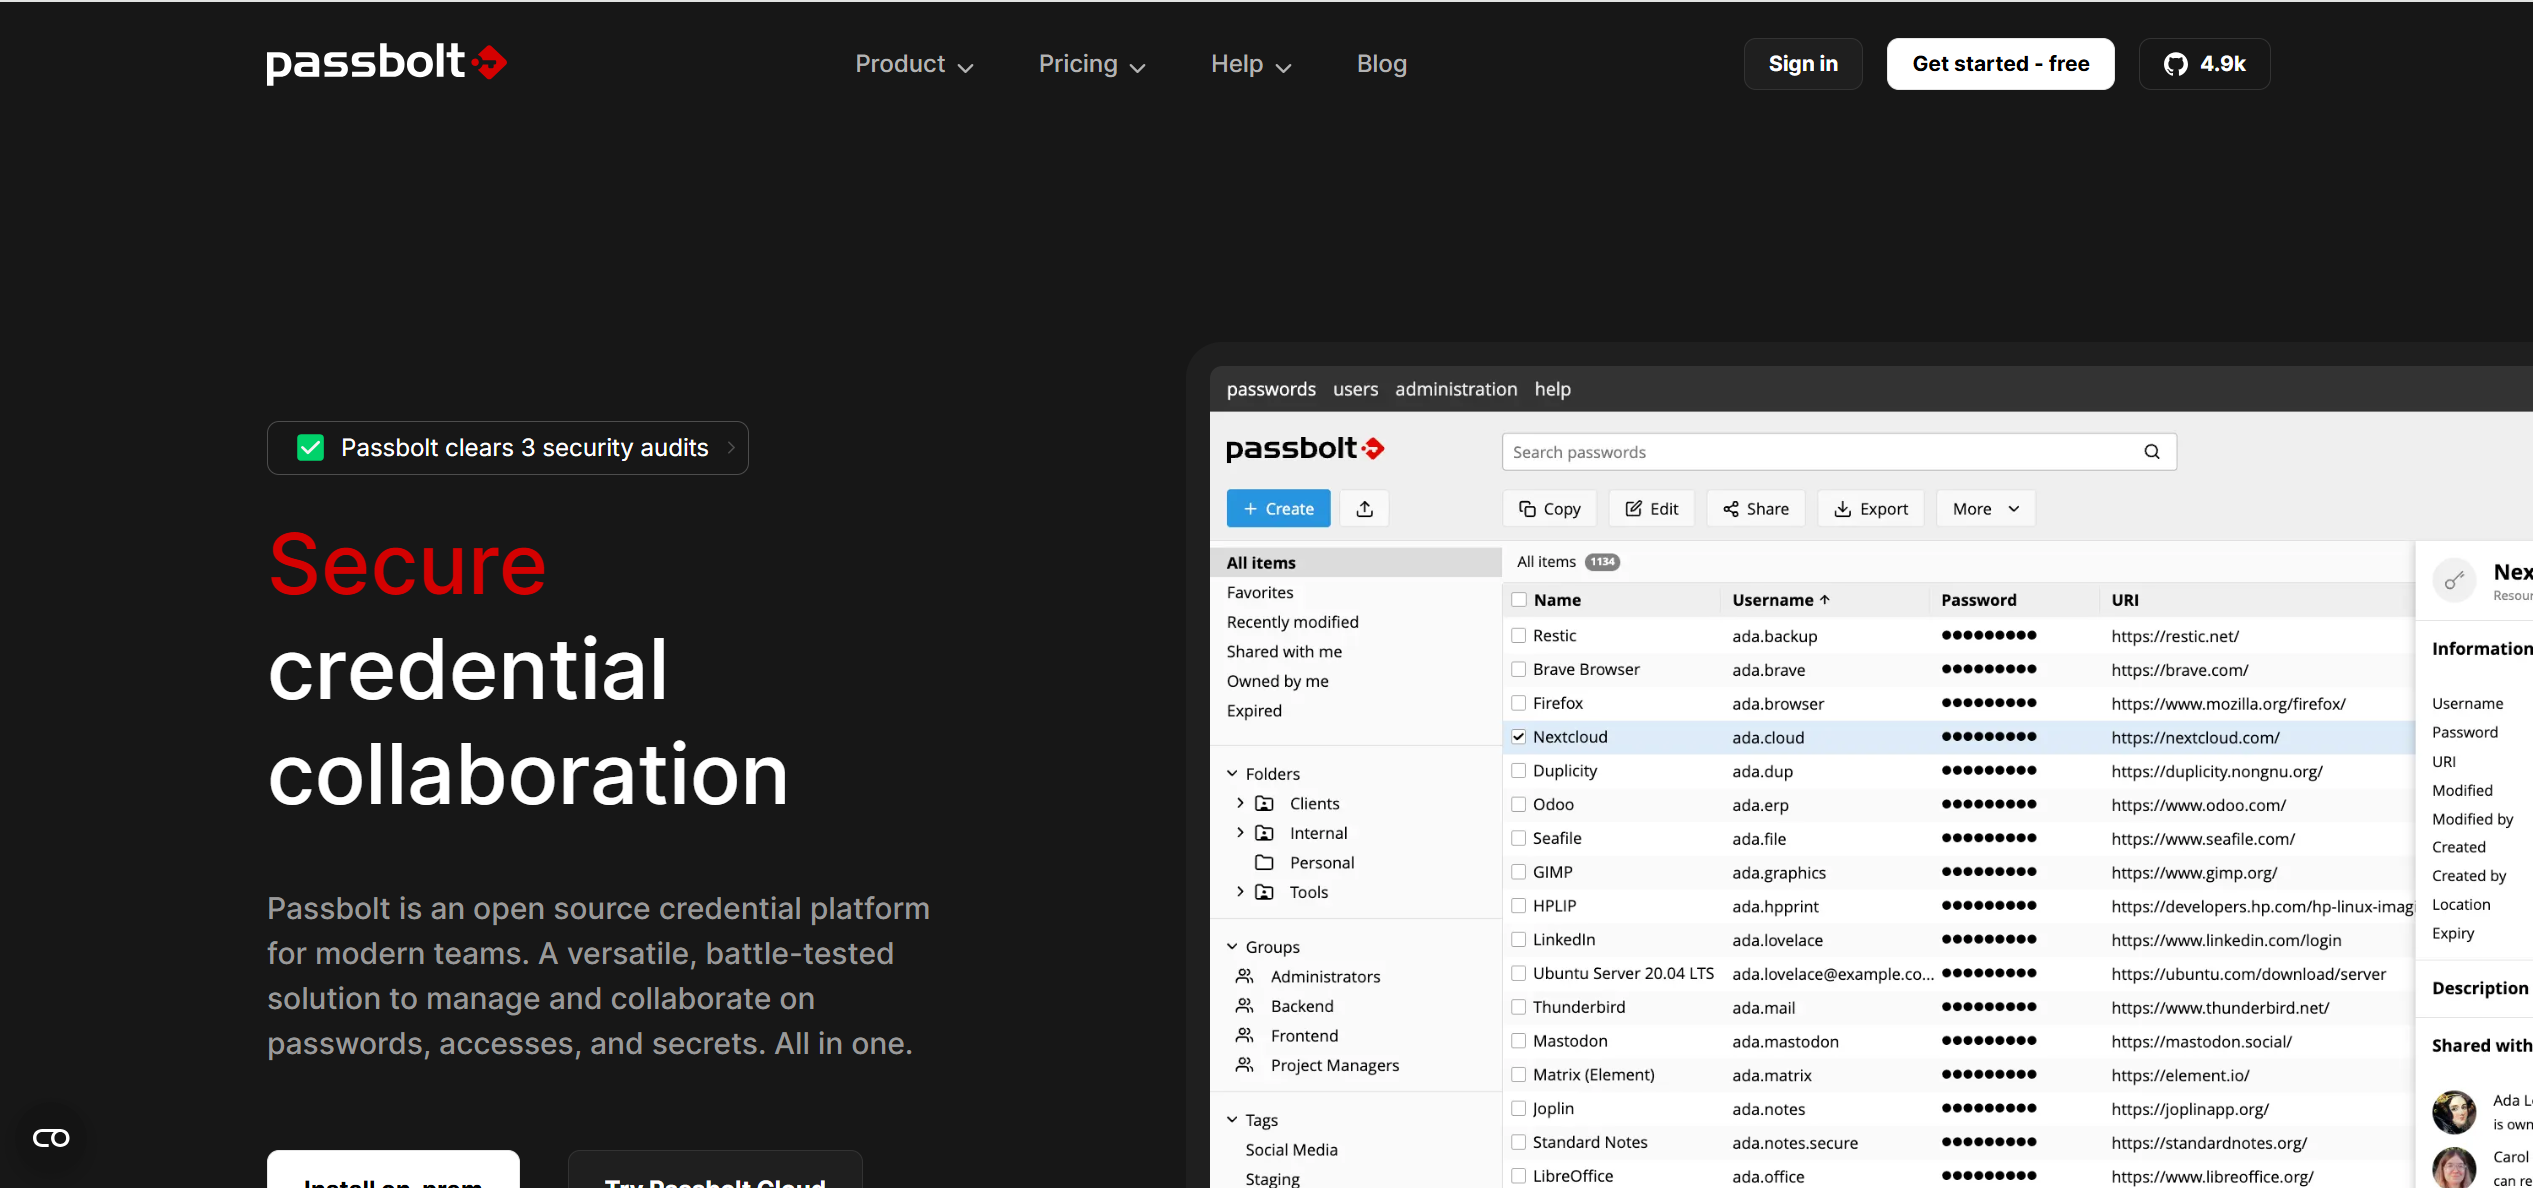
- Access the Web Interface:
- Open a browser and navigate to https://<your-instance-ip> or https://<your-domain> (if a domain is configured).
- If successful, you’ll see the Passbolt setup page.
- Check Logs (Alternative):
- Log in to your instance via SSH or the Lish console using your limited sudo user credentials.
- Run the following command to confirm:bash
grep -i 'installation complete' /var/log/stackscript.log - Look for the “Installation Complete!” message.
Post-Deployment Configuration
To make Passbolt fully operational:
- Configure Email Settings:
- Passbolt uses email for notifications (e.g., account registration, password recovery).
- Default Setup: Postfix is installed, enabling test emails.
- Production Use: Configure a dedicated SMTP provider (e.g., Gmail, SendGrid) for reliability. See Passbolt’s Configure Email Providers guide for details.
- Create the First Admin User:
- Access the Passbolt web interface and follow the on-screen prompts to set up your first admin account.
- This account manages users and settings.
- Enhance Security:
- SSL/TLS: If using a domain, obtain and install an SSL certificate (e.g., via Let’s Encrypt) for HTTPS.
- Firewall: Restrict access to ports 80 (HTTP) and 443 (HTTPS) only.
Troubleshooting Common Issues
- Installation Fails:
- Solution: Check logs via SSH or Lish for errors:bash
cat /var/log/stackscript.log - Ensure the instance wasn’t interrupted during setup.
- Web Interface Inaccessible:
- Solution: Verify the IP or domain, ensure ports 80 and 443 are open, and confirm the Passbolt service is running.
Additional Resources
For more information:
Security and Maintenance Tips
- Keep Updated: Regularly update Passbolt to the latest version for security patches.
- Backup: Schedule backups of your Passbolt instance to prevent data loss.
- Secure Access: Use strong passwords and SSH keys, and consider a firewall for added protection.
Related Posts


Lets Hosting is a hosting media powered by human+AI and offers a wide range of information and resources for anyone looking for web hosting solutions. From VPS to dedicated servers, LetsHosting.com provides guides and reviews on various hosting options to help people make informed decisions about their hosting needs.
